Suzanne Williamson, RD
Registered dietitian and founder of Frugal Organic Mama. I've started sourdough starters from scratch half a dozen times — in different kitchens, different climates, and once in the middle of summer in a kitchen that stayed above 80°F. Each time teaches you something different about what the microbes actually need.
🍞 Once your starter is active, nail the hydration.
The hydration calculator handles baker's percentages for any sourdough recipe — so the ratio math doesn't slow you down.
My first sourdough starter smelled like nail polish remover by Day 3. I threw it away. I started a new one. It also smelled like nail polish remover on Day 3. I threw that one away too.
The third time, I was determined to understand what was actually happening before I made a decision. I looked up the microbiology. I found out that the acetone smell is completely normal — it's ethanol production from the initial wild yeast population before the bacterial ecosystem stabilizes. It goes away on its own around Day 4-5. Both of the starters I discarded were probably one or two days from becoming something useful.
This guide is written to tell you what to actually expect each day — including the things that look like failure and aren't — so you don't make the same mistake I did.
What a Sourdough Starter Actually Is
A sourdough starter is a cultivated ecosystem of wild yeast and lactic acid bacteria (LAB) that you maintain by feeding it flour and water. When flour, water, and time come together, wild microorganisms present on the flour (especially in whole grain flour) and in your environment begin to multiply.
The wild yeast (Saccharomyces cerevisiae and related species) produces carbon dioxide — the gas that makes your bread rise. The lactic acid bacteria (primarily Lactobacillus species) produce lactic acid and acetic acid — the flavors that make sourdough sour.
Creating a starter from scratch is the process of selecting for and concentrating these organisms by feeding them regularly. You're not adding anything external — you're creating the right conditions for what's already present to multiply.
As an RD, I find this genuinely interesting from a fermentation science perspective: the same microorganisms that make sourdough work are also involved in yogurt, cheese, sauerkraut, and most traditional fermented foods. The principles are the same — create an environment where beneficial organisms outcompete harmful ones.
What You Need
Equipment:
- Clean glass jar (a quart mason jar works perfectly — wide enough to observe, clear enough to see bubbles, the right size for most starter quantities)
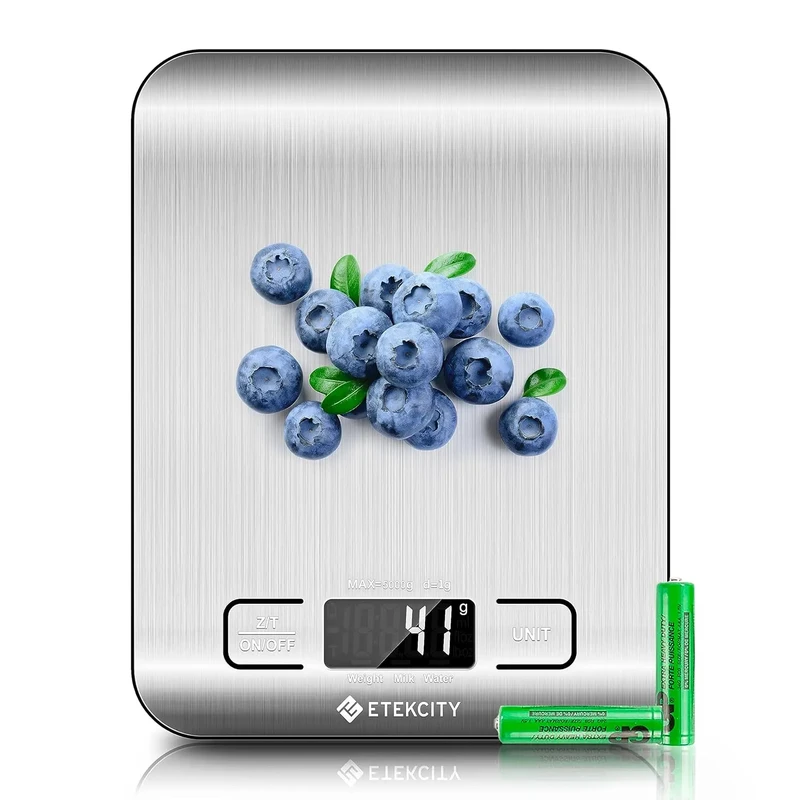
- Kitchen scale (essential — measuring flour by weight is the only reliable method; cup measurements vary too much)
- Rubber band or tape to mark the starter level after feeding
- Thermometer (helpful to know your kitchen temperature)
Ingredients:
- Flour — unbleached all-purpose or bread flour for most of the process; whole wheat or rye for the first few days if you want to speed things up
- Water — filtered or rested tap water. Chlorinated tap water can inhibit the microorganisms you're trying to cultivate. If you have well water, use it. If you're on municipal water, either filter it or fill a glass and let it sit uncovered for an hour before using — chlorine off-gasses at room temperature.
That's it. Flour and water. No yeast packets. No special cultures. No sugar. Just flour, water, and the wild organisms that come with them.
The timeline below is the part most beginners misread: Day 3 often looks successful for the wrong reason, Day 4 often looks dead, and the real question is whether the starter becomes reliable by the end of the second week.
Day 1: Mix and Expect Almost Nothing
What to do: In a clean jar, combine 50g unbleached flour (or 25g whole wheat + 25g all-purpose) and 50g room-temperature filtered water. Mix thoroughly until no dry flour remains. The consistency should be like thick pancake batter. Cover loosely (the jar lid set on top but not sealed, or a cloth secured with a rubber band) — you want airflow but not drying out. Leave at room temperature, 70-75°F if possible.
Mark the level with a rubber band or tape. This lets you see if and how much it rises.
What to expect: Nothing much. The mixture might look slightly different in 12-24 hours, or it might look exactly the same. Either is fine.
The smell: Like raw flour. Maybe faintly funky as the day goes on. Normal.
Day 2: First Bubbles and the Acetone Smell
What to do: Check the mixture. Then feed it: discard (or set aside) all but about 50g of the mixture. Add 50g fresh flour and 50g water. Mix well. Re-mark the level.
What to expect: Possibly some small bubbles throughout the mixture. Possibly a slight rise. Possibly nothing visible yet. The mixture should look slightly more alive than yesterday.
The smell: This is when the acetone/nail polish remover smell often starts. This is ethanol production from the first wave of wild yeast activity. It is completely normal. Do not throw this away.
What's actually happening: Leuconostoc bacteria are the first to colonize because they're tolerant of the neutral pH environment. They produce CO₂ and ethanol. This gives you bubbles and that distinctive smell. These are not the organisms that will power your mature starter — they'll die off as acidity increases — but they're doing important work by beginning to change the environment.
Day 3: The False Rise
What to do: Feed as before — discard to 50g, add 50g flour + 50g water.
What to expect: This is often the most dramatic-looking day. The starter may have risen significantly, possibly doubled, possibly has lots of bubbles. It looks like it's working.
The honest truth: This is almost certainly a false rise. The leuconostoc bacteria are at peak activity, producing a lot of gas. When you feed today and reset the level, the starter will likely rise less than it did yesterday, or hardly at all. Most people see this and think something went wrong when they fed it — in fact, this is the natural progression.
The smell: Still possibly acetone-like, possibly with a hint of something more sour beginning to develop underneath it.
What I tell beginners: Don't get excited on Day 3. It looks great, but it's a false signal. The real work starts now, when the environment acidifies and real sourdough organisms begin to take over.
Day 4: The Quiet Valley
What to do: Feed as before.
What to expect: This is the day that makes people give up. The starter may show very little activity — less than Day 3, possibly less than Day 2. It might smell sour and unpleasant. It might look like you killed it.
You didn't kill it. This is the transition period. The leuconostoc bacteria are dying off as acidity increases. The wild yeast and lactobacillus that will power a mature starter are beginning to establish, but they're not yet at sufficient population to produce visible rise. The starter is working — it's just at an invisible, biochemical stage rather than a visible, physical one.
The smell: Often the sharpest and most unpleasant of any day in the process. Sour, vinegary, possibly still with an alcohol edge. This is normal and it will improve.
What I do differently than most guides: I add a small amount of whole wheat or rye flour here — maybe 10g out of my 50g feeding — to introduce more wild organisms. The bran in whole grain flour carries much higher concentrations of wild yeast and bacteria than refined flour. In my experience, this shortens the valley and accelerates the transition.
Day 5: The Turn Toward Real Activity
What to do: Feed as before. At this stage, you can start feeding twice a day if you want to accelerate development — morning and evening, both times discarding to 50g before adding 50g flour + 50g water.
What to expect: Some activity resuming. Not the dramatic rise of Day 3, but actual, authentic fermentation beginning. Small bubbles throughout the mixture. Possibly a slight dome forming at the surface after a few hours.
The smell: Starting to shift. Less sharp, more complex. You might notice something that smells like yogurt or fresh bread alongside the sour notes. This is lactic acid bacteria establishing dominance and changing the aromatic profile.
The feel: By now the starter has a slightly different texture — looser, with more gas incorporated, more alive-feeling when you stir it.
Days 6-7: Building Momentum
What to do: Continue twice-daily feedings if you started them, or once daily if not. The ratio still matters: always discard to about 50g before feeding.
What to expect: Increasing predictability. If your kitchen is warm enough and the starter is developing well, you should start to see it rise within 4-6 hours of feeding and fall back down over the next 4-8 hours. Mark the level each time you feed so you can track the pattern.
Signs of genuine progress:
- Domed surface at peak rise (a dome, not just bubbles at the top)
- Bubbles throughout the mixture, not just at the surface
- Airy, web-like texture when you drag a spoon through it
- Smell shifting from sharp/chemical toward pleasantly sour, slightly yeasty
Signs you need more time:
- Only surface bubbles, no bubbles throughout
- No consistent rise pattern
- Smell still predominantly acetone or sharp vinegar
Days 8-14: Toward a Reliable Starter
What to do: Continue twice-daily feedings. Now start paying attention to the timing pattern rather than just whether it rises.
The goal: Consistent doubling within 4-8 hours of feeding at room temperature, followed by a fall back to near original level before the next feeding. This predictable rise-and-fall cycle is what you need before baking.
Room temperature matters enormously here. A starter in a 65°F kitchen might rise in 8-10 hours and never look as dramatic as the same starter at 75°F rising in 4 hours. Neither is wrong — you need to understand your starter's behavior in your kitchen's specific conditions.
The float test: When you think the starter might be ready, feed it and wait until it's at peak rise (domed surface, just starting to flatten slightly). Drop a small spoonful into a glass of water. If it floats, the starter has enough gas incorporated to leaven bread. If it sinks, it needs more time.
The float test is a useful confirmation but not a complete test — a starter should also have a consistent pattern of activity before you trust it with a bread recipe.
💡 The minimum reliability test before baking: Your starter should pass the float test AND double consistently within 4-8 hours for at least 2-3 consecutive feedings. One good performance doesn't mean it's stable. Two or three in a row means you can probably bake with it.
Temperature: The Variable That Changes Everything
I've started starters in a 68°F kitchen in January and a 78°F kitchen in August. The difference in timeline was about 5 days — the summer starter was ready in 7 days, the winter one took nearly 12.
A starter below 65°F develops extremely slowly. Yeast metabolism drops significantly with temperature, and cold environments favor the wrong organisms for sourdough development.
A starter above 80°F develops quickly but can over-acidify — the bacteria produce acid faster than the yeast can keep pace, and the resulting starter is overly sour and sluggish. In my summer kitchen, I moved to twice-daily feedings early and watched the timing more carefully.
Practical tricks:
- Top of the refrigerator (near the heat exhaust): often 5-8°F warmer than the rest of the kitchen
- Inside the oven with just the oven light on: oven light bulbs generate gentle warmth, typically landing around 75-80°F
- Near (not on) a heating vent: warm ambient air without direct heat
The temperature you're working with determines your timing expectations. Don't compare your Day 5 to someone else's Day 5 without knowing their kitchen temperature.
What the Discard Is For (And What to Do With It)
The discard step confuses many beginners. You're throwing away most of what you just grew — why?
The functional reason: As the starter ferments, acidity increases. If you never discarded and just kept adding flour, the acidity would eventually drop so low that yeast can't function (yeast is more acid-sensitive than the bacteria). Discarding resets the pH by diluting the acid with fresh flour and water, keeping the environment within the range where yeast can thrive.
The secondary reason: Population ratio. You want the organisms to have adequate food. 50g of active starter fed 50g of flour has a very different organism-to-food ratio than 200g of starter fed 50g of flour. Discarding keeps the population density in a range where feeding is meaningful.
What to do with it: In the early days (Days 1-5), I just discard it — the microbial ecosystem isn't stable enough to produce reliable flavor in baked goods. From Day 6 onward, discard can be used for:
- Sourdough pancakes — the most forgiving application, and a good way to evaluate how the starter is developing flavor
- Crackers — thin, crispy, and almost impossible to mess up
- Flatbreads — mix with a little olive oil and salt, cook in a hot cast iron pan
I keep a separate "discard jar" in the refrigerator from Day 6 onward. It accumulates until I have enough for a batch of something. See our Sourdough Discard Guide for recipes.
Ready to use your new starter in a recipe?
The hydration calculator handles all the baker's percentage math — enter any recipe and get the exact flour and water amounts.
Troubleshooting: What's Actually Wrong
Starter smells like nail polish / acetone beyond Day 5: This smell shouldn't persist past Day 4-5 in a normally developing starter. If it's still dominant on Day 6+, your starter is over-acidified and needs a reset. Discard more aggressively (keep only 20g) and feed with fresh flour and water at a 1:2:2 ratio (20g starter : 40g flour : 40g water). Feed twice daily. The extra dilution helps bring down the acid load.
No activity whatsoever after 5 days: Most likely cause: temperature. Move to a warmer spot. If your kitchen is under 68°F, the starter is probably alive but barely active. The second most likely cause: chlorinated water. Switch to filtered water immediately.
Pink, orange, or red streaks in the starter: Stop. Throw it away. This is bacterial contamination — specifically Serratia marcescens or similar — that is not part of a healthy starter ecosystem. Start over with a clean jar and fresh flour. Make sure your jar was properly washed and rinsed.
Black liquid on top: This is called "hooch" — it's alcohol produced by a hungry starter. This happens when the starter hasn't been fed in a long time and the organisms have consumed all available food. It looks alarming but it's not dangerous. Pour off the liquid or stir it back in, then feed the starter. It will recover. A starter that regularly produces hooch needs more frequent feeding.
Starter rises but falls completely flat before 12 hours: Very active starter in a warm environment. Switch to twice-daily feedings. The starter is working well — it just moves faster than once-daily feeding can sustain.
Starter is stable but bread doesn't rise: The starter may be mature but your bulk fermentation timing or shaping may be the issue. See Bulk Fermentation: Temperature Guide & Time Chart and Troubleshooting Flat Sourdough.
Maintaining Your Starter Long-Term
Once established, a starter can be maintained indefinitely with regular feeding. I have a starter that's been going for several years now — the same culture, just fed continuously.
Room temperature maintenance (baking frequently): Feed once or twice daily. Discard before each feeding. Store loosely covered on the counter.
Refrigerator storage (baking weekly or less): Feed the starter, let it sit at room temperature for 2-4 hours until you see some activity, then cover and refrigerate. Feed once a week to keep it viable. When you want to bake, take it out of the refrigerator and let it come to room temperature, then give it 1-2 feedings before using.
Long-term storage (months): A thin layer of starter spread on parchment paper and dried completely becomes starter "flakes" that can be stored in an envelope for months or years and rehydrated later. I've done this when traveling and not wanting to leave my starter with someone. Rehydrating takes 3-5 days of regular feeding to get back to full activity.
The Frugal Perspective
A bag of all-purpose flour and a week of attention creates a leavening agent that costs nothing to maintain and will last indefinitely. Commercial yeast works reliably and quickly, but it has a cost and a shelf life. A healthy sourdough starter is essentially free once established.
The flour cost during the establishment period is minimal — maybe 200-300g of flour over 7-10 days, less than $0.50. The maintenance cost is whatever small amount you feed it each time, offset by the fact that you're not buying commercial yeast.
Beyond frugality: the flavor and texture of sourdough leavened bread is different from commercially yeasted bread in a way that's hard to describe until you've tasted it side by side. The complexity of flavor from a long fermentation, the chewy crumb, the open structure when done well — these don't come from a yeast packet. They come from the ecosystem you're building right now.
Related Reading
- When Is Sourdough Starter Ready to Use? — The specific signs that distinguish a reliable starter from one that needs more time
- How Long Does Sourdough Starter Last? — What to do once your starter is mature enough to keep on the counter or in the fridge
- Bulk Fermentation: Temperature Guide & Time Chart — How temperature controls fermentation speed once you start baking
- Sourdough Discard 101 — What to make with starter discard from Day 6 onward
- Troubleshooting Flat Sourdough — When the bread doesn't rise despite an active starter