Suzanne Williamson, RD
Registered dietitian and founder of Frugal Organic Mama. I've processed hundreds of pounds of tomatoes over the years — for my own family, and in community food programs where getting the safety steps right wasn't optional.
🍅 How many jars do you need for your harvest?
Enter your tomato weight — get the exact quart and pint jar count before you start buying supplies.
The first time I processed tomatoes from my garden, I did everything right except one thing: I used fresh lemon juice from the lemon sitting on my counter instead of bottled. The jars sealed beautifully. The tomatoes looked perfect. I was proud.
A few months later, when I was reviewing food safety protocols for a community nutrition program, I realized what I'd done. Fresh lemon juice has variable pH — the fruit I'd used might have been fine, or it might not have acidified the tomatoes adequately. I had no way to know. I threw out that entire batch.
That was an expensive lesson in why food preservation has rules that look arbitrary until you understand the food science behind them.
This guide covers the complete water bath canning method for tomatoes, with particular attention to the steps that actually matter for safety — because with home canning, the consequences of shortcuts aren't visible until it's too late.
Why Tomatoes Need Added Acid (The Food Science)
Tomatoes occupy an uncomfortable pH range. Most fall between 4.0 and 4.9 — straddling the critical 4.6 threshold that separates "safe for water bath canning" from "requires pressure canning."
The concern is Clostridium botulinum. Its spores survive in soil (and therefore on tomatoes), and in a sealed, low-acid, anaerobic environment — exactly what a canning jar is — those spores can germinate and produce botulinum toxin. Below pH 4.6, the acid environment inhibits this. Above it, the risk is real.
The problem: tomato pH isn't consistent. It varies by:
- Variety — heirloom varieties often have higher pH than Roma or San Marzano
- Ripeness — overripe tomatoes lose acidity as they mature
- Growing season — drought-stressed tomatoes can have elevated pH
- Individual fruit — even within the same plant, tomatoes vary
A tomato that looks identical to a safe one might have a pH of 4.4 or 5.1. You cannot tell by looking. You cannot tell by taste reliably. The only way to create a consistent safety margin is to add a measured amount of verified acid to every jar.
The USDA requirement:
- Quart jars: 2 tablespoons bottled lemon juice OR 0.5 teaspoon citric acid
- Pint jars: 1 tablespoon bottled lemon juice OR 0.25 teaspoon citric acid
Why bottled, specifically: Bottled lemon juice is standardized to approximately pH 2.0. The FDA requires consistent acidity for bottled lemon juice sold as a food product. Fresh lemons vary from pH 2.0 to 2.6 depending on variety, ripeness, and storage — a range wide enough to create meaningfully different acidification outcomes in your jar.
I use citric acid now instead of lemon juice. It's cheaper, has no effect on flavor at the required dose, stores indefinitely, and has perfectly consistent acidity. If flavor matters for your application, use the lemon juice. For plain canned tomatoes destined for soups and sauces, citric acid is the more practical choice.
What Tomatoes Work Best
Through years of canning, I've developed strong opinions on this:
Paste tomatoes (Roma, San Marzano, Amish Paste): These are what I use for almost everything. Lower water content means you get more actual tomato per jar, the texture holds up better, and the liquid isn't watery. A 25-pound box of Romas fills roughly 7 quart jars. The same weight of slicing tomatoes might fill 9 jars but with more liquid and less body.
Slicing tomatoes (beefsteak, heirloom varieties): These work fine but produce a thinner, more watery result. Good for tomato juice or soups where liquid content doesn't matter. For a sauce base, I find the texture disappointing.
Cherry and grape tomatoes: I've done these whole in pint jars. They're beautiful and the flavor is excellent, but the skins can be tough after processing. Worth doing if you have an abundance.
What not to use:
- Overripe, cracked, or soft tomatoes — lower acid content, more surface bacteria, soft spots that survived washing can harbor pathogens
- Blossom-end rot or other significant damage — cut these out generously or set them aside for immediate use, not canning
- Green tomatoes — different pH profile, not tested for water bath canning
The community kitchen I worked with received a lot of donated tomatoes, sometimes in mixed condition. I learned to sort aggressively — a few questionable tomatoes in a batch are not worth the risk they introduce. If in doubt, route it to immediate cooking.
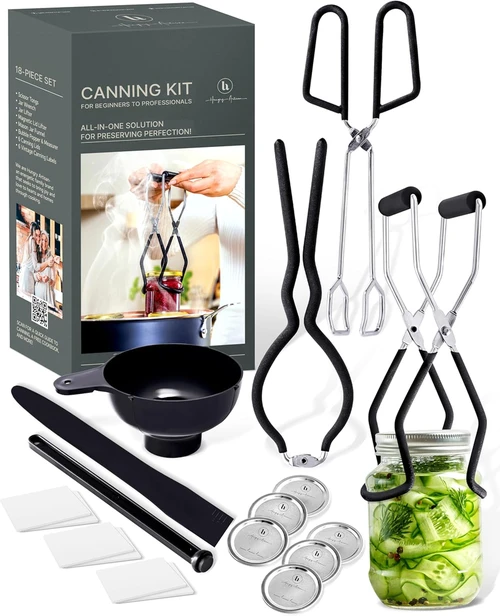
Equipment You Actually Need
Non-negotiable:
- Large pot with rack (jars must not touch the bottom, and must be covered by 1–2 inches of water — for quarts you typically need a pot at least 12 inches deep)
- Mason jars in good condition — no chips on the rim, no cracks
- New flat lids (the sealing compound is single-use)
- Bands/rings (reusable if undamaged)
- Jar lifter
- Wide-mouth canning funnel
Strongly recommended:
- Lid wand or small tongs (for handling hot lids)
- Bubble remover tool or thin spatula
- Timer (85 minutes is non-negotiable, don't rely on memory)
- Permanent marker for labeling
Not necessary:
- Special tomato-canning equipment
- Pressure canner (for plain tomatoes with added acid, water bath is correct)
- A dedicated water bath canner — any large pot with a rack works
One note on lids: I buy Ball or Kerr lids. I've tried store-brand lids from a restaurant supply store and had a noticeably higher failure rate. New lids from a known brand are cheap insurance on a day's worth of work.
Complete Step-by-Step Method
Before You Start
Read through everything once before you begin. Canning has timing dependencies — you can't pause mid-process because the tomatoes are ready and the jars aren't. I set out all equipment before washing a single tomato.
Calculate your jar count using the Harvest Calculator before starting. Running out of jars mid-batch is genuinely disruptive.
Step 1: Prepare Your Jars
Wash jars in hot soapy water and inspect every rim. Run your finger around the rim — any chip or rough spot means that jar doesn't get used today. Discard or use it for refrigerator storage.
Keep washed jars hot until you fill them. I keep mine in a 200°F oven or in the canner with hot (not boiling) water. Cold jars introduced to hot tomatoes crack. This is called thermal shock and it wastes your tomatoes and your time.
Step 2: Prepare the Tomatoes
Washing: Wash all tomatoes thoroughly under running water. Even organically grown tomatoes have soil bacteria on the surface.
Coring: Remove the stem end and any blemishes. Cut out anything soft, cracked, or discolored, going at least ½ inch around the visible damage.
Peeling: This step is optional but standard for most canned tomato applications. Skins toughen during processing and most people find them unpleasant in sauces.
To peel: score a small X at the base of each tomato with a paring knife. Blanch in boiling water for 30–60 seconds — you're looking for the skin to just start separating at the score mark, not for the tomato to cook. Transfer immediately to an ice bath. The skins slip off easily once they've cooled enough to handle.
The sensory check: properly blanched skins start to wrinkle and pull back from the score mark. Under-blanched and the skin grips. Over-blanched and the tomato starts to get soft and the flesh begins cooking — you lose texture for the finished product.
Preparing for the jar: Leave tomatoes whole, halve them, or crush them depending on your intended use. I mostly do halved or crushed — they pack more efficiently and I find whole peeled tomatoes a bit unwieldy in recipes.
Step 3: Add Acid to Each Jar
Before any tomato goes into a jar, the acid goes in first.
Per quart jar: 2 tablespoons bottled lemon juice OR 0.5 teaspoon citric acid powder Per pint jar: 1 tablespoon bottled lemon juice OR 0.25 teaspoon citric acid powder
Add directly to the hot, empty jar. This is not a step you add "at the end" or "when you remember." It goes in first, every jar, every time.
If you're adding canning salt (optional — salt is for flavor only, not safety), add it now: 1 teaspoon per quart, ½ teaspoon per pint.
Step 4: Fill the Jars
Pack tomatoes into jars firmly enough to eliminate large air pockets, but don't crush them into pulp. Press halved tomatoes cut side down. If you're using crushed tomatoes, they'll settle naturally.
Add cooking liquid (the liquid that came out of the tomatoes during preparation) or boiling water to cover, leaving 0.5 inch headspace — measured from the top of the liquid to the rim of the jar.
Headspace matters. Too little and you risk the lid not sealing as liquid expands during processing. Too much and you get a weak vacuum that may not hold during storage.
Step 5: Remove Air Bubbles
Run a thin spatula or bubble remover tool around the inside wall of the jar in 3–4 places. Air trapped in pockets between tomatoes doesn't transfer heat properly during processing — the center of the jar needs to reach a temperature sufficient for safety, and trapped air insulates it.
After running the tool, recheck your headspace. Air bubbles make room, and the level often drops slightly. Top up with liquid if needed.
Step 6: Wipe Rims and Apply Lids
Any food residue on the jar rim prevents a proper seal. Wipe every rim with a clean damp cloth or paper towel. I go around twice — once to clean, once to confirm.
Apply flat lids and screw bands until fingertip-tight. This means tightened until you feel resistance, then backed off slightly. Over-tightened bands don't allow air to vent during processing, which can cause seal failure. Under-tightened bands allow water to get in. Fingertip-tight is the right feel — secure but not cranked down.
Step 7: Process in the Water Bath
Lower jars into the canner using a jar lifter. Jars should not touch each other. Water must cover the tops of the jars by at least 1 inch — measure this, don't estimate. Add boiling water from a kettle if needed to reach the right level.
Cover the canner and bring to a full rolling boil. Start your timer only when the water is at a full, vigorous boil — not simmering, not almost boiling.
Processing times (water bath, altitudes up to 1,000 feet):
- Whole or halved tomatoes packed in tomato juice: 85 minutes (quarts and pints)
- Crushed tomatoes: 85 minutes (quarts and pints)
- Tomato juice: 40 minutes (quarts), 35 minutes (pints)
Altitude adjustments:
- 1,001–3,000 feet: add 5 minutes
- 3,001–6,000 feet: add 10 minutes
- Above 6,000 feet: add 15 minutes
Maintain a boil throughout. If you lose your boil, bring it back to full boil and restart the timer from zero. Yes, the entire 85 minutes. I know that's frustrating, but the processing time is based on how long it takes heat to penetrate to the center of a full quart jar at boiling temperature — a partial process doesn't provide partial safety.
Planning your canning session?
Calculate jar counts before you buy supplies — the calculator uses USDA packing densities for tomatoes.
Step 8: Remove, Cool, and Check
When processing time is complete, turn off heat and remove the canner lid. Let jars sit in the hot water for 5 minutes before removing — this prevents siphoning (liquid being pulled out of jars by rapid temperature change), which can compromise seals.
Remove jars with the jar lifter without tilting. Tilting shifts the liquid inside and can cause seal failure. Place on a towel-covered surface with 1 inch of space between jars. Do not put hot jars directly on a cold counter.
Leave undisturbed for 12–24 hours. Do not press down on lids during cooling to "check" the seal — you can cause false seals that will fail later. Do not tighten bands after cooling.
After 12–24 hours, check seals: the center of the lid should be concave (curving inward) and should not flex when pressed. If it bounces, the jar did not seal. Unsealed jars go directly into the refrigerator and get used within a week.
Remove the bands before storage — bands left on can mask a failed seal if corrosion forms under them.
What I Watch For: Sensory Checks Throughout
Beyond following the steps, I've learned to pay attention to specific signals:
During filling: The tomatoes should smell clean and fresh. Any fermented or off smell means something is wrong — don't can it.
When wiping rims: Any sticky, sugary film on the rim (from tomato juice) needs to come off completely. I can feel the difference between a clean rim and one that still has residue.
During processing: A steady, moderate boil throughout. If the boil drops to simmering, add heat. If it's boiling so violently that jars are rattling, reduce heat — violent boiling can cause jars to bump and crack.
When removing jars: Some lids will ping as they seal during cooling — this is the vacuum forming as the contents cool. Satisfying sound. But hear it or not, always check seals manually after 12 hours.
Before opening for use: Check the seal again. The lid should still be concave and non-flexing. If the jar has any off smell when opened, any unusual color, or any spurting when opened, discard without tasting. Botulinum toxin is odorless and tasteless — a jar that smells fine is not necessarily safe, but a jar that smells wrong is definitely not.
Common Mistakes and What Actually Happens
Using too many damaged or overripe tomatoes: The batch looks fine going in. The issue is that damaged tomatoes have compromised cell structure and reduced acid content, and soft spots can harbor surface bacteria at higher concentrations. The added lemon juice helps but doesn't fix fundamentally poor starting material. I sort every tomato before it gets near a jar.
Adjusting the acid addition: "I only had 1.5 tablespoons of lemon juice left, so I used that for the quart jar." This is the exact reasoning that creates an inadequately acidified jar that looks and seals identically to a safe one. Keep a backup bottle of bottled lemon juice or a jar of citric acid on hand so you never find yourself in this position.
Overfilling jars: More than ½ inch headspace and the vacuum will be weak. Less than ½ inch and liquid boils out during processing, coating the rim and preventing a seal. I measure every jar with a headspace tool.
Starting the timer before full boil: I made this mistake in my first few canning seasons. "It's pretty much boiling" isn't the same as "full rolling boil." The processing times are calculated for full boiling temperatures. Start the timer only when you see vigorous, rolling bubbles across the entire surface.
Not adjusting for altitude: Water boils at a lower temperature at higher elevations. The published processing times assume 212°F boiling. At 5,000 feet, water boils around 202°F — less thermal energy means longer processing time needed to achieve the same internal jar temperature. If you're above 1,000 feet and haven't been adjusting, look up your altitude and add the appropriate time.
The Frugal Math
A 25-pound box of Roma tomatoes from a farmers market or a u-pick farm typically costs $15–25 in season. That yields approximately 7 quart jars of whole or crushed tomatoes. Comparable store-brand canned tomatoes run $2–3 per quart, or $14–21 for seven quarts.
At those prices, home canning tomatoes doesn't save dramatic amounts of money — the real value is in quality and control. Home-canned tomatoes from a known source, without BPA-lined cans, without citric acid added for commercial purposes, processed when perfectly ripe rather than picked early for shipping. As an RD, that quality argument matters more to me than the marginal cost savings.
Where home canning does save meaningfully: if you're growing your own tomatoes. Seed costs are trivial, the main input is time, and the output is shelf-stable tomatoes at effectively zero ingredient cost.
The 25-pound box also scales well — I typically process 75–100 pounds per season in a single weekend session, which sets us up through winter without buying canned tomatoes at all.
Storage and Shelf Life
Properly sealed jars stored in a cool, dark location are safe indefinitely — the USDA says best quality within 12–18 months, but safety isn't the concern after that, flavor and texture are. After 18 months the tomatoes will still be safe but may be softer and less bright-tasting.
Store without the bands (remove after seals are confirmed). Bands left on can hide a failed seal that forms later, and they can corrode against the lid.
Label with date and contents. I include a batch number so if I ever have an issue I can identify which session it came from.
Before opening any jar: check the lid (still concave?), check for any spurting when opened, smell immediately after opening. If anything seems off, discard. Do not taste-test questionable jars — botulinum toxin is fatal at extremely small doses and there is no reliable sensory indicator of its presence.
Related Reading
- Water Bath vs Pressure Canning: Which Do You Actually Need? — The pH science behind why tomatoes need acid addition and green beans need a pressure canner
- USDA Canning Guidelines Explained — What the official guidelines actually mean, in plain language
- What Is Headspace in Canning? — Why the gap at the top of your jar is a safety measurement
- The Cost of Canning — Full economics of home canning vs buying commercial