Suzanne Williamson, RD
Registered dietitian and founder of Frugal Organic Mama. I use all three methods and have learned when each one makes sense through years of garden harvests and several spectacular failures. The first time I tried to can green beans without a pressure canner was a food safety lesson I won't forget.
🫙 Planning a canning session?
The harvest calculator tells you exactly how many jars you need before you start — by produce type and jar size.
A summer garden produces more than you can eat fresh. The question is which preservation method fits your food, your storage situation, and the time you have.
There's no single best answer. Each method has genuine advantages and real trade-offs. Understanding them lets you match the method to the food and the situation, rather than defaulting to one approach for everything.
How Each Method Works
Freezing stops microbial activity by lowering temperature below the point where bacteria and mold can reproduce. At 0°F, frozen food is safe indefinitely — quality degrades over months, but safety does not. Most vegetables need blanching first to deactivate enzymes that continue operating at freezer temperatures and degrade color, flavor, and texture.
Canning creates a shelf-stable, sealed environment through a combination of heat (killing pathogens), acidity (inhibiting surviving organisms), and vacuum seal (preventing recontamination). The method required — water bath or pressure canning — depends entirely on the acidity of the food being preserved.
Dehydrating removes moisture to a level where bacterial growth is impossible. Bacteria, mold, and yeast all require water to metabolize and reproduce. Reducing moisture content below 15% creates an environment where food preservation happens through desiccation rather than temperature or acidity.
The Master Comparison Table
| Factor | Freezing | Canning | Dehydrating |
|---|---|---|---|
| Active time per batch | 15–30 min | 2–4 hours | 30 min prep + 6–14 hrs passive |
| Equipment needed | Freezer + bags | Pot/canner + jars + lids | Dehydrator or oven |
| Upfront equipment cost | $0 (have freezer) | $30–80 (water bath) $100–200 (pressure) | $40–400 (dehydrator) |
| Ongoing cost | Electricity + bags | Lids only (~$0.20/jar) | Electricity (6–14 hrs) |
| Shelf life | 3–12 months quality Indefinitely safe | 1–2 years No electricity needed | 1–3 years No electricity needed |
| Power outage risk | Loses all food if extended | Zero risk | Zero risk |
| Storage space | High — requires freezer space | Moderate — pantry shelf | Minimal — very compact |
| Skill required | Low | High — safety rules critical | Moderate |
| Texture after preservation | Closest to fresh | Softer, cooked texture | Chewy/crisp, concentrated flavor |
| Nutrient retention | High | Good (some heat loss) | Good (some heat loss) |

Freezing: The Fastest, Most Forgiving Method
Freezing is where most home gardeners start, and many never need to go further. The method is straightforward, the results are excellent, and the safety margin is generous.
What freezing does well: Almost every fruit and vegetable can be frozen successfully. Corn, green beans, peas, spinach, kale, broccoli, tomatoes, berries, peaches — all freeze well. The key distinction is intended use: frozen vegetables are for cooked applications. They will never return to their fresh, crisp texture after thawing, but in soups, stir-fries, casseroles, and sauces, the difference from fresh is minimal.
The blanching requirement: Most vegetables need 2–5 minutes in boiling water followed by an ice bath before freezing — this deactivates the enzymes that cause color, flavor, and texture degradation in the freezer. Skip blanching and your green beans will be gray and starchy within 2–3 months. With blanching, they hold quality for 10–12 months.
The notable exceptions that don't need blanching: tomatoes (the freeze-thaw cycle achieves what blanching would), hot peppers, herbs in oil, and most fruits.
For complete blanching times for each vegetable, see our Vegetable Blanching Timer.
The practical constraints: Freezer space and electricity. A typical chest freezer holds 14–20 cubic feet and uses about 1 kWh per day — roughly $4–5 per month in electricity. A full summer harvest from a 4×8 raised bed can fill 10–15 cubic feet of freezer space. If you're preserving large quantities, the freezer itself may become the limiting factor.
Power outage vulnerability: A full freezer holds safe temperature for 48 hours with the door closed. An extended outage (days) can result in total loss of everything stored. For households in regions with unreliable power, this is a meaningful risk that canning and dehydrating don't share. See Power Outage Food Safety for the full timeline.

Canning: Shelf-Stable, Space-Efficient, Safety-Critical
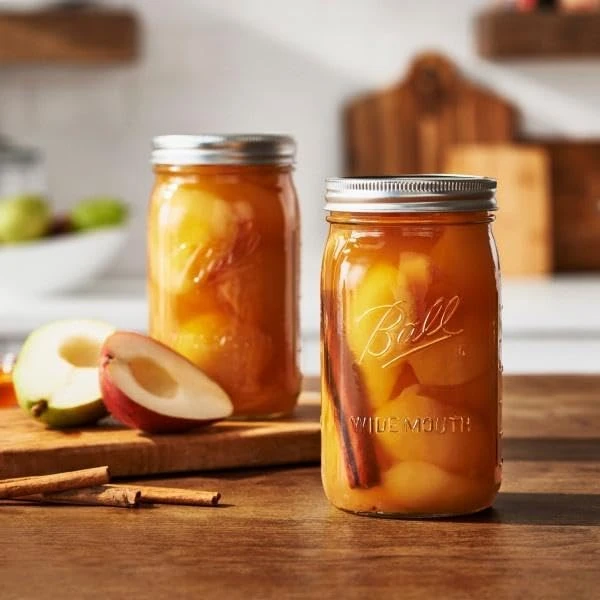
Canning produces jars of food that sit on a pantry shelf for a year or more without refrigeration or freezing. This is its fundamental advantage — and also why the safety rules exist and cannot be improvised.
Water Bath vs Pressure Canning: The Decision That Cannot Be Skipped
The single most important thing to understand about canning is that the method depends on the acidity of the food — and this is not flexible.
Water bath canning (boiling water, 212°F) is safe for high-acid foods:
- pH below 4.6: tomatoes (with added acid), fruits, jams, jellies, pickles, fruit juices
Pressure canning (240°F under pressure) is required for low-acid foods:
- pH above 4.6: all vegetables except tomatoes and pickles, beans, meat, poultry, fish, soups
The reason: Clostridium botulinum — the bacterium that produces botulinum toxin — forms heat-resistant spores that survive boiling water temperatures. At 212°F in a water bath, those spores survive. At 240°F in a pressure canner, they are destroyed. The only way to safely can low-acid vegetables is with a pressure canner.
Botulinum toxin is odorless, colorless, and tasteless in contaminated food. There is no way to detect it by smell or appearance. This is why improvising canning methods — using a regular pressure cooker instead of a pressure canner, extending water bath canning time for low-acid vegetables — is genuinely dangerous.
The USDA Complete Guide to Home Canning provides tested recipes for every canned food. Following tested recipes exactly — including jar size, pack method, headspace, and processing time — is the safety foundation of home canning. For an explanation of why these specifics matter, see USDA Canning Guidelines Explained.
What canning does well: Large quantities of the same food processed at once. A 25-pound batch of tomatoes (roughly what a productive 4×8 bed produces in peak season) becomes 7–9 quart jars that sit on a shelf for 18 months. No freezer space consumed. No electricity for storage. Ready to use at any moment without thawing.
The economics of canning improve with scale. The equipment cost amortizes over years of use. Reusable jars (rings and jars, replace only lids each time) make per-jar cost minimal after the initial investment. A quart of home-canned tomatoes costs $0.50–1.50 to produce depending on whether you grew the tomatoes; the store equivalent is $2.50–4.00.
For jar count planning before a canning session, see Garden Harvest to Jar Calculator.

Dehydrating: The Most Compact Storage
Dehydration removes 80–95% of a food's water content. A pound of fresh tomatoes becomes 1–2 ounces of dried tomatoes. A pound of fresh herbs becomes a small jar. The volume reduction is more dramatic than any other preservation method.
This compactness makes dehydrating the ideal method for emergency storage, camping food, or situations where storage space is severely limited.
How dehydrating works: Food is exposed to low heat (125–165°F depending on food type) and moving air for 6–14 hours until moisture content drops below 15%. At this moisture level, bacteria, mold, and yeast cannot reproduce.
Equipment options:
A dedicated food dehydrator ($40–400 depending on quality) provides consistent temperature and airflow across multiple trays. Entry-level models work for occasional use; a Excalibur or similar mid-range dehydrator is worth the investment if you dehydrate regularly.
An oven at its lowest setting (usually 170°F, slightly higher than ideal for most foods) with the door slightly propped to allow moisture to escape. Slower and less consistent than a dehydrator, but functional. Energy-intensive for the duration.
Air drying (herbs, some peppers): simply hanging in a warm, dry location with good airflow. The oldest preservation method, requires no equipment, works perfectly for low-moisture herbs.
What dehydrates well:
- Herbs: the easiest and fastest (4–6 hours), and home-dried herbs are significantly more flavorful than store-bought
- Fruits: apples, mangoes, berries, apricots — produce excellent snacks and baking ingredients
- Tomatoes: dried tomatoes are intensely flavored and reconstitute well in cooking
- Mushrooms: dry beautifully, reconstitute fully, last 1–2 years
What dehydrates less well:
- High-fat foods (avocado, fatty meats): fats go rancid during drying
- High-moisture vegetables (cucumber, lettuce): become papery and unpalatable
- Dairy (except yogurt leather and some cheeses): texture issues
The blanching question for vegetables: Most vegetables should be blanched before dehydrating — the same reason as freezing: enzyme deactivation prevents color and flavor degradation during the extended drying time. Unblanched dehydrated vegetables often turn dark and develop off-flavors within months.
The safety margin: Properly dehydrated food has the lowest food safety risk of the three methods — there is essentially no bacterial growth possible in truly dry food. The risk is inadequate drying: food that appears dry but retains enough moisture internally to support mold growth. The test: a properly dried piece of fruit should be pliable but not sticky; properly dried vegetables should be brittle and snap cleanly.
The Nutritional Comparison
All three methods preserve most nutrients well compared to the alternative of fresh food sitting at room temperature for days.
Vitamin C is the most heat-sensitive common nutrient. Blanching (required before freezing and dehydrating vegetables) destroys 15–25% of vitamin C. The canning process (longer heat exposure) typically destroys 30–50% of vitamin C. Dehydrating at lower temperatures preserves vitamin C better than high-temperature canning.
Minerals (calcium, magnesium, potassium, iron): all three methods preserve minerals well. Minerals are not heat-sensitive or degraded by freezing. Some leach into canning liquid, but if you use the liquid the minerals are retained.
Fiber: unchanged by all three methods.
Carotenoids (beta-carotene, lycopene): actually increase in bioavailability with heat processing. Cooked and canned tomatoes have higher bioavailable lycopene than raw tomatoes. This is the one nutritional area where canning has a genuine advantage.
The honest nutritional summary: the differences between methods are modest compared to eating preserved food versus eating no vegetables. All three produce nutritionally valuable food. Choose based on practical factors, not marginal nutritional differences.
Matching Method to Food
| Food | Best method | Also works | Notes |
|---|---|---|---|
| Tomatoes | Canning | Freezing, dehydrating | Must add acid for water bath. Freezing works for overflow. |
| Green beans | Freezing | Pressure canning | Requires pressure canning — not water bath. Freezing is easier. |
| Berries | Freezing | Canning (jam), dehydrating | Freeze whole for smoothies. Can for shelf-stable jam. |
| Corn | Freezing | Pressure canning | Blanch first. Cut from cob before freezing for best results. |
| Herbs | Dehydrating | Freezing (in oil) | Dried herbs are far more concentrated than fresh. Air dry works. |
| Leafy greens | Freezing | Dehydrating (powder) | Blanch first. Squeeze dry before freezing. Excellent in soups. |
| Apples | Dehydrating | Canning (sauce/butter), freezing | Dried apples are excellent snacks. Applesauce cans beautifully. |
| Cucumbers | Canning (pickles) | Fermentation | Cucumbers do not freeze or dehydrate well — cell structure breaks down. |
| Peppers | Freezing or dehydrating | Canning (pickled) | Freeze without blanching. Dehydrate for flakes or powder. |
| Mushrooms | Dehydrating | Freezing (sautéed first) | Dried mushrooms reconstitute fully and are superior to frozen. |

The Strategy That Works for Most Home Gardeners
After a decade of working through harvests of varying sizes, this is the system I've settled on:
Freeze the daily overflow. Whatever comes out of the garden each day that I can't eat fresh goes into the freezer — quickly, with minimal processing. Five tomatoes from today, a handful of green beans from tomorrow. This captures produce at peak ripeness without requiring a dedicated preservation session.
Can when I have enough for a full session. Canning makes sense at scale — 20+ pounds of the same produce processed at once. I watch the garden and plan canning days for when I'll have that volume. A single 3-hour canning session processes what would fill 8–10 freezer bags. The pantry shelf gets fuller, the freezer space is freed up.
Dehydrate herbs and peppers as they come. Herbs dry quickly (6–8 hours) and store in minimal space. Hot peppers I dry whole or in flakes and use all winter. These get processed in small batches whenever I have time.
Reserve fermentation for specific produce. Cucumbers become pickles. Cabbage becomes sauerkraut. These don't freeze or can as well as they ferment.
Starting a canning session this weekend?
Enter your produce weight and the harvest calculator tells you exactly how many jars you'll need — before you go buy supplies.
Related Reading
- How to Can Tomatoes at Home — Complete water bath canning method with USDA safety rules and acid addition requirements
- Water Bath vs Pressure Canning — Why the pH of what you're canning determines which method is safe
- How to Blanch Vegetables for Freezing — The blanching step most vegetables need before freezing
- Freeze Tomatoes Without Blanching — The one common vegetable that doesn't need blanching before freezing
- Power Outage Food Safety — How long your frozen food stays safe when the power goes out — the main risk of freezing as a preservation strategy
- How Long Do Pickles Last? — Shelf life for fermented, canned, and refrigerator pickles — the fourth preservation method not covered in this guide