Sarah Chen
Food safety and preservation editor at Frugal Organic Mama. I've reviewed hundreds of home canning cases, and green beans are the vegetable I see most frequently processed incorrectly — water bath canned when only pressure canning is safe. The USDA guidelines exist because of documented botulism cases, and this article walks through the exact tested method to keep your pantry safe.
⚠️ Green beans require pressure canning — not water bath canning.
This is not a preference or a tradition — it is a food safety requirement. Green beans are a low-acid food (pH above 4.6). Water bath canning temperatures (212°F) cannot destroy Clostridium botulinum spores in low-acid foods. Pressure canning reaches 240°F, which is sufficient. There are no safe water bath recipes for plain green beans.
🫘 How many jars will your harvest fill?
The harvest calculator gives jar counts for any weight of green beans before you start — so you know how many lids to have ready.
Green beans are one of the most productive summer vegetables — a single 4×8 raised bed can yield 15–20 pounds in a good season. They're also one of the most common sources of home canning mistakes, because they look simple and the water bath method seems like it should work.
It doesn't. This guide covers why, and the complete pressure canning method that does.
Why Green Beans Cannot Be Water Bath Canned
The safety of home canning depends on a single principle: the processing method must reliably destroy Clostridium botulinum spores in the specific food being canned.
C. botulinum spores are heat-resistant and can survive boiling water (212°F). In high-acid environments (pH below 4.6), germinated bacteria cannot grow and produce toxin — which is why water bath canning is safe for tomatoes, fruits, pickles, and jams. The acidity itself is a preservation mechanism alongside the heat.
Green beans have a pH of approximately 5.3–6.0 — well above the 4.6 safety threshold. In this low-acid environment, any spores that survive processing can germinate after the jar seals, producing botulinum toxin in an anaerobic sealed jar. The toxin is odorless, colorless, and tasteless. There is no way to detect it by looking at or smelling the jar.
Pressure canning reaches 240°F by processing food under 10–15 pounds of pressure. At 240°F, C. botulinum spores are reliably destroyed within the USDA-tested processing times. This is not optional for low-acid foods — it is the only method that produces a safe product.
The history matters here: Green beans have caused more botulism outbreaks from home canning than any other vegetable. Almost all of these cases involved water bath canning, canning without a tested recipe, or reducing processing times. Following tested USDA recipes exactly is not about being overly cautious — it is the specific intervention that prevents a genuinely dangerous outcome.
Equipment You Need
Pressure canner: Not a pressure cooker. A pressure canner is specifically designed for canning — it has a larger capacity (holds 7 quart jars), a pressure gauge (dial or weighted), and a safety lock. A standard stovetop pressure cooker is not an appropriate substitute for canning — its smaller size affects heat distribution and the gauges are not tested for canning accuracy.
The two common types:
- Dial gauge canner (Presto): has a numbered pressure dial. Requires annual testing by your local cooperative extension office to ensure accuracy. Inaccurate dial gauges are one of the most common causes of under-processed home-canned food.
- Weighted gauge canner (All American, Mirro): uses a weight that jiggles at a specific pressure. Does not require calibration. Simpler and more reliable for most home canners.
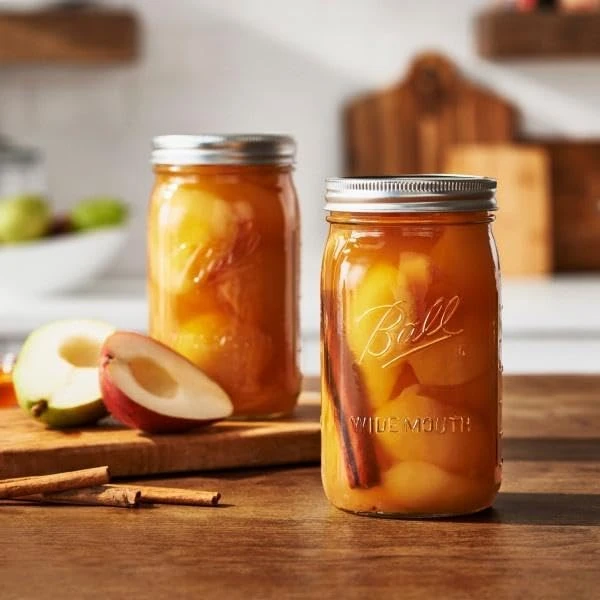
Mason jars: Quart or pint jars specifically designed for home canning — Ball, Kerr, or equivalent. Do not use commercial mayonnaise jars, recycled pasta sauce jars, or other repurposed glass. These are not manufactured to withstand repeated pressure canning cycles and may crack or seal improperly.
New lids: Use new lids (the flat disc with sealing compound) for every batch. Bands (the screw rings) can be reused if they are not corroded or bent. Do not reuse lids — the sealing compound compresses on first use and will not reliably seal again.
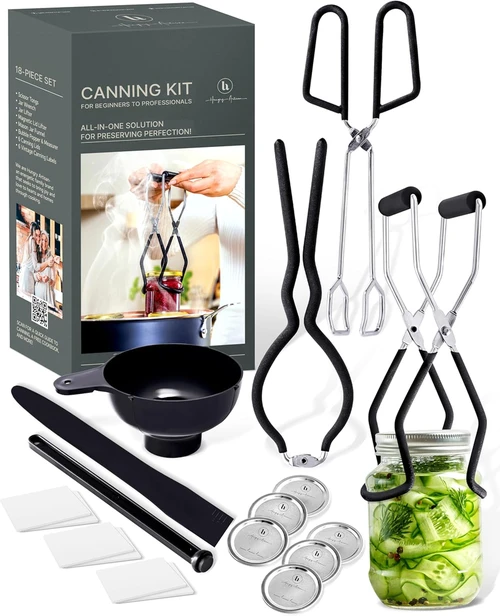
Additional tools: Jar lifter (essential — you cannot safely handle hot jars without one), canning funnel, bubble remover or thin spatula, magnetic lid wand, clean damp cloths for wiping jar rims.
How Much to Buy or Harvest
| Target jars | Fresh beans needed (raw pack) | Fresh beans needed (hot pack) |
|---|---|---|
| 7 quarts (1 canner load) | 14 lbs | 11 lbs |
| 9 pints (1 canner load) | 9 lbs | 7 lbs |
| 4 quarts (half load) | 8 lbs | 6 lbs |
| 1 quart | ~2 lbs | ~1.5 lbs |
| 1 pint | ~1 lb | ~0.8 lbs |
Batch packing averages ~2 lbs per quart for tightly packed raw pack (USDA/NCHFP data). Single-jar yields may vary slightly depending on bean size and packing density.
Hot pack produces more jars per pound because pre-cooking shrinks the beans before packing — they fit more compactly in the jar. Raw pack produces fewer jars but is easier and the beans hold their shape better.
Raw Pack vs Hot Pack
Both methods are USDA-tested and equally safe. The choice affects texture and jar yield.
Raw pack: Beans go into the jar uncooked. Simpler — no pre-cooking step. Beans emerge from pressure canning firmer and hold their shape better. Slightly fewer jars per pound of beans.
Hot pack: Beans are boiled for 5 minutes before packing. Produces more jars from the same harvest. Beans are softer in texture. The pre-cooking liquid can be used as the packing liquid, which carries some water-soluble nutrients.
For first-time canners, raw pack is easier and more forgiving.
The Complete Pressure Canning Method

Step 1: Prepare the Beans
Wash fresh beans thoroughly under running water. Snap or cut off the stem ends — the blossom ends can be left on. Break or cut beans into 1–2 inch pieces. Discard any beans that are soft, moldy, or discolored.
The quality principle: Canning concentrates the quality of what you start with. Beans that are past their peak produce inferior canned product. Can beans the same day as harvest whenever possible — this is when sugar content is highest and texture is best.
Step 2: Prepare Jars
Wash jars, lids, and bands in hot soapy water and rinse well. Inspect each jar for cracks or chips at the rim — even a hairline crack means discard that jar.
Keep jars hot until you fill them: either in a pot of simmering water on the back burner, or fresh from a dishwasher on the heated dry cycle. Hot jars go into a pressure canner with hot water — thermal shock from a cold jar into a hot canner can crack the glass.
Step 3: Fill the Jars
Raw pack method:

Pack beans tightly into hot jars — they will shrink during processing. Leave exactly 1 inch of headspace at the top. Add ½ teaspoon of non-iodized canning salt to pints, 1 teaspoon to quarts if desired. Salt is purely for flavor — it has no safety function in pressure canning and can be omitted.
Cover beans with boiling water, maintaining 1 inch of headspace. Run a thin spatula or bubble remover around the inside edge of the jar to release trapped air bubbles. Check headspace again and add more boiling water if needed.
Hot pack method:
Boil prepared beans in water for 5 minutes. Pack loosely into hot jars (they will pack more compactly than raw beans). Cover with the cooking liquid or fresh boiling water, leaving 1 inch headspace. Remove bubbles and check headspace.
Step 4: Seal Jars
Wipe each jar rim with a clean damp cloth — any residue on the rim will prevent a proper seal. Apply a new lid, then a band fingertip-tight. Do not overtighten: the lid needs to allow air to escape during processing. Fingertip-tight means tightened until you feel resistance, then stop.
Step 5: Load and Vent the Canner
Add 2–3 inches of hot water to the canner (check your canner's manual for exact amount). Place the jar rack in the canner. Load filled jars using a jar lifter — do not tilt jars. Lock the canner lid.
Heat on medium-high with the vent pipe open (or petcock open on older canners). Let steam vent in a steady stream for 10 full minutes. This step — called exhausting — removes air from the canner. If air remains, the pressure gauge will be inaccurate and the temperature inside will be lower than the gauge reads.
After 10 minutes of steady venting: place the weight on the vent pipe (weighted gauge canners) or close the petcock (older dial gauge canners).
Step 6: Process at Correct Pressure
Allow pressure to rise to the correct level. Maintain steady pressure throughout the entire processing time by adjusting heat — small adjustments work better than large swings.

| Altitude | Dial gauge pressure | Weighted gauge | Pints | Quarts |
|---|---|---|---|---|
| 0–2,000 ft | 11 lbs | 10 lbs | 20 min | 25 min |
| 2,001–4,000 ft | 12 lbs | 15 lbs | 20 min | 25 min |
| 4,001–6,000 ft | 13 lbs | 15 lbs | 20 min | 25 min |
| 6,001–8,000 ft | 14 lbs | 15 lbs | 20 min | 25 min |
Source: USDA Complete Guide to Home Canning, Guide 6. These are the only USDA-tested processing times for green beans.
If pressure drops during processing: Bring pressure back up and restart the full processing time from zero. A pressure drop means the temperature dropped below the safe threshold, and the beans in the center of the jars may not have reached the required temperature.
Step 7: Depressurize Naturally
When the processing time is complete, turn off the heat. Do not move the canner. Do not run it under cold water. Do not tilt it. Let it depressurize completely on its own — this takes 30–45 minutes for most canners.
Natural depressurization is not optional. Rapid depressurization causes liquid to be siphoned out of the jars, which can break the seal and leave the jar headspace compromised.
When the pressure gauge reads zero and the safety lock releases, wait an additional 10 minutes. Then remove the lid carefully, tilting it away from you so steam doesn't hit your face.
Step 8: Remove and Cool Jars

Use a jar lifter to remove jars one at a time, keeping them upright. Place on a folded towel with 1–2 inches of space between jars. Do not tilt, invert, or move jars for 12–24 hours.
You will hear lids "ping" as they seal while cooling — this is the vacuum forming. After 24 hours, check the seal: remove the band and press the center of each lid. A properly sealed lid will be concave (curved downward) and will not flex when pressed. A lid that flexes or pops up is not sealed — refrigerate that jar and use within 1 week.
After Processing: Storage and Use
Labeling: Write the contents and date on each jar before storing. Home-canned green beans look similar to other canned vegetables — labeling prevents confusion.
Storage: Store sealed jars in a cool, dark location — a basement, pantry, or cabinet away from heat sources. Properly processed and sealed home-canned green beans maintain best quality for 1–2 years. Safety does not automatically end at 2 years, but quality — particularly texture and color — declines.
Before eating: Boil home-canned green beans for 10 minutes before tasting or serving. This precautionary step destroys any botulinum toxin that might be present. Commercially canned beans do not require this step.
Discard without tasting if:
- The lid is not sealed (flexes when pressed)
- The jar spurts liquid when opened
- The contents smell off, look foamy, or appear moldy
- The jar lid was bulging
When in doubt, throw it out. Botulinum toxin is the most acutely lethal substance known — the potential consequence of eating improperly processed low-acid food is not proportionate to the value of one jar of beans.
Variations You Can Can Safely
Dilly beans (pickled green beans): Adding vinegar brine to green beans raises the acidity to below 4.6 pH — which means dilly beans CAN be water bath canned. The vinegar changes the food safety rules. Processing time for water bath dilly beans: 10 minutes for pints. This is a completely different recipe from plain canned green beans.
Green beans with other vegetables: USDA has tested specific recipes for green beans with tomatoes, green beans with potatoes, and similar combinations. Use only tested recipes — the processing time for combination recipes accounts for the lowest-acid ingredient in the jar.
Do not add: Butter, oil, flour, cornstarch, or other thickeners to canned green beans. These change the density and heat penetration characteristics of the jar contents, making the USDA-tested processing time no longer valid.
The Frugal Math
A full canner load of 7 quart jars from your garden:
- Green beans: $0 (garden) or $12–18 (farmer's market at $1/lb)
- Lids: $0.20 × 7 = $1.40
- Salt: negligible
- Energy (pressure canning session): approximately $0.30–0.50
- Total: $2–20 per 7 quarts
Store equivalent: organic canned green beans $1.50–2.50 per 15oz can. Seven quarts = approximately 28 15-oz cans = $42–70 retail.
The economics of pressure canning green beans are most favorable when you're using garden produce. At farmer's market prices, the margin narrows but remains positive — particularly when you factor in quality (canned at peak freshness) and the absence of additives.
Planning your canning session?
The harvest calculator tells you exactly how many jars your green beans will fill — before you go buy lids and set up the canner.
Related Reading
- Water Bath vs Pressure Canning — Why the pH of what you're canning determines which method is safe
- USDA Canning Guidelines Explained — What the USDA testing process means and why following tested recipes matters
- How to Make Sauerkraut at Home — The 2% salt ratio lacto-fermentation method — a different preservation path for your garden cabbage
- Fermentation Temperature Guide — How temperature affects fermentation speed, flavor, and safety
- How to Blanch Green Beans — Blanching and freezing as the alternative to pressure canning for green bean preservation
- Freezing vs Canning vs Dehydrating — When to choose each preservation method for your harvest